
Pattern 950029
2024-03-20
Hat Embroidery Tips for Beginners
2024-04-03EMBROIDERY TIPS
How to maintain embroidery machine
POSTED ON APRIL 3th,2024 BY BAi
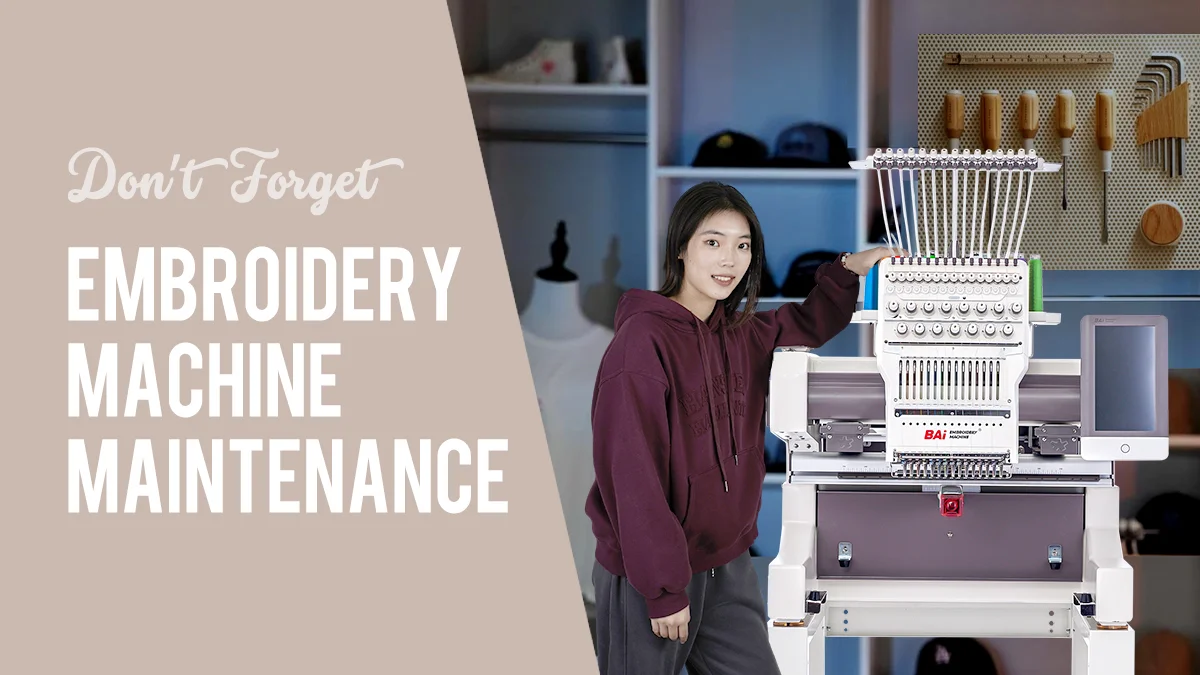
We all know that if you want to keep a flower, then you need to fertilize and water it regularly to get rid of pests. Similarly, if you want to keep a machine running for a long time, regular maintenance is indispensable, so is the embroidery machine. Maintenance is a "big job" made up of many little things, such as cleaning, oiling, replacing embroidery needles and so on. It's not that difficult, and often a simple action you take can spare you a lot of hassle in the future. In this blog I will introduce you to the following:
# Why should you maintain your embroidery machine?
# How to clean an embroidery machine?
# How to oil an embroidery machine?
# How to change embroidery machine needles?
# What other things need to be taken care of?
1. Why should you maintain your embroidery machine?
Before describing the specifics of ways to maintain your embroidery machine, let's start by looking the benefits of maintaining embroidery machine:
-Extend service time: embroidery machine is a kind of precision mechanical equipment, regular maintenance can effectively extend its life. Regular cleaning and oiling can reduce the wear and tear of the machine and keep the machine running normally, thus reducing the possibility of malfunctioning
-Improve embroidery quality: Regular needle replacement ensures that the embroidery machine works properly and maintains the quality and effect of the embroidery. Using worn out needles may lead to problems such as skipped stitches and fabric damage, affecting the beauty and firmness of the embroidery.
-Improve work efficiency: Regular maintenance ensures the proper functioning of the embroidery machine and reduces malfunctions and downtime, thus improving work efficiency. Maintaining embroidery machines is a preventive maintenance measure, which can reduce the probability of machine problems and keep production running continuously.
-Saving maintenance costs: Regular maintenance can identify potential problems with the machine and fix them in time to prevent small problems becoming big ones. Timely maintenance and repair can reduce unnecessary damages and malfunctions, avoiding the increase of maintenance costs.
2. How to clean an embroidery machine?
A dirty machine tends to affect the customer's view, and it also causes problems such as birdnest and stains on the embroidery. So, you need to clean .
-Tools
Cleaning Brush: You need to have at least one brush for removing dust, fibers and embroidery thread debris from your embroidery machine. A hard bristle brush may scratch the surface of the embroidery machine or damage critical parts such as needles, so it is usually recommended to use a soft bristle brush rather than a hard bristle brush.
Cleaning Cloth: Prepare soft flannel or cotton cloths for wiping embroidery surfaces, screens and soiled areas. Wet wipes can also be used instead.
Cleaner: Whether or not to use a cleaner depends on the specific area cleaning needs of the embroidery machine. Generally, the exterior of an embroidery machine can be cleaned with a damp wipe or cotton cloth without the need for a cleaner. However, if the needles or other parts of the felting machine are subjected to heavy soiling from oil, sticky residue, or mold, a moderate amount of a specific cleaner may be more effective. Since the machine often is oiled, a light degreasing type cleaner is recommended. Avoid using corrosive cleaners.
-Steps:
#1 Turn off the power
Always turn off the power before cleaning the embroidery machine to ensure safety.
#2 Clean the outside
This includes the embroidery machine's body, base and touch screen, which often contain dust and dirt. Use a clean cotton cloth moistened with water, or just use wet wipes, to wipe these parts. When wiping to the touchscreen section, pay attention to ease the strength.
In addition, oil stains are likely to be present around areas that need to be refueled, so wipe with a slight degreasing type cleaner.
#3 Cleaning the shuttle bed
The needle moves up and down during the operation of machine embroidery, and it is easy to leave embroidery threads, fabric scraps and other debris in the bobbin.
Take out the bobbin case, check whether there is any accumulation of threads, fibers or other debris inside the bobbin, and use a soft brush to clean it up to ensure smooth embroidery.
#4 Clean the scissors
When trimming embroidery threads, it is easy to leave thread debris and lint behind. Use a brush to clean the blade area of the scissors in a timely manner to ensure the sharpness of the scissors.
-Frequency:
After each use of the embroidery machine, it is recommended that the machine surface and bobbin be cleaned at least briefly to ensure cleanliness and smooth operation.
In addition to simple cleaning after each use, more thorough cleaning should be performed periodically. The exact intervals can depend on how often the embroidery machine is used and the environment in where it is used. If you use frequently, a daily or weekly cleaning may be appropriate, or if you use it rarely, a full cleaning can be done every month or two months.
Additionally, if you are in trouble with your embroidery machine, such as thread skipped, thread broken, specific areas may need to be cleaned and adjusted.
-Precautions:
Don't clean with excessive force to avoid damaging the parts of the embroidery machine.
Use appropriate cleaning agents and tools to avoid damages to the embroidery machine.
Take care to prevent water or cleaners entering the sensitive parts of the embroidery machine, which may cause a short circuit or lead to malfunctions.
3. How to oil an embroidery machine?
Strange noises from your machine are the most obvious reminder that it's time to oil. By oiling and greasing your machine, you can help reduce friction between parts, reduce noise, minimize skipping, and extend the life of your machine. Oil points include moving parts and connection points. Be careful not to overuse the oil.
-Tools
Sewing machine oil: It is usually used to oil the moving parts of embroidery machines, such as shafts and bearings. We recommend using ordinary white sewing machine oil, which is low viscosity, easy to evaporate, and abrasion resistant. You can buy it almost anywhere craft supplies are sold.
Oil Dripping Tool: Sewing machine oil is usually used in conjunction with a small oil bottle or drip pen. This allows you to control the amount of oil precisely, so that you don't overdo it or drip it on areas that don't need oil. Our machines come with a free clear plastic oil bottle. However, if you want to control the amount of oil dripping more precisely, you can also buy a precision oil pen. They usually cost around $10 or so, so head over to Amazon and pick one up.
Grease: Use grease on cams and other locations to ensure proper motor running. It is recommended to use oils that have medium viscosity, high temperature, oxidation, and non-volatile properties, such as Tri-Flow Clear Synthetic Grease ,Lucas White Lithium Grease, and so on. You can buy it from Amazon or hardware stores.
Brush: For applying the grease, you need to have a clean brush.
Screwdriver: Used to remove protective covers from specific areas to facilitate oiling the inside of the machine.
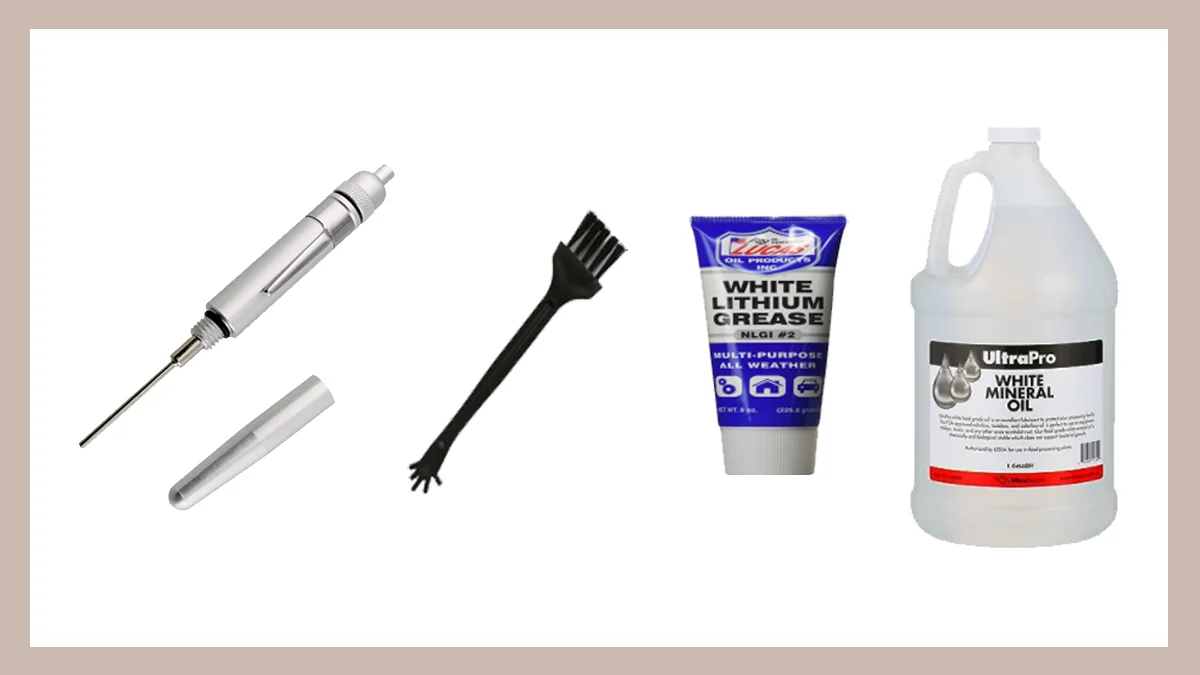
TIPS: It is not recommended to use overly viscous oils or greases, which are easily to create deposits and lead to clogging.
-Steps
#1 Turn off the power: For safety, disconnect the power supply and make sure the machine is stopped before performing any oil operation.
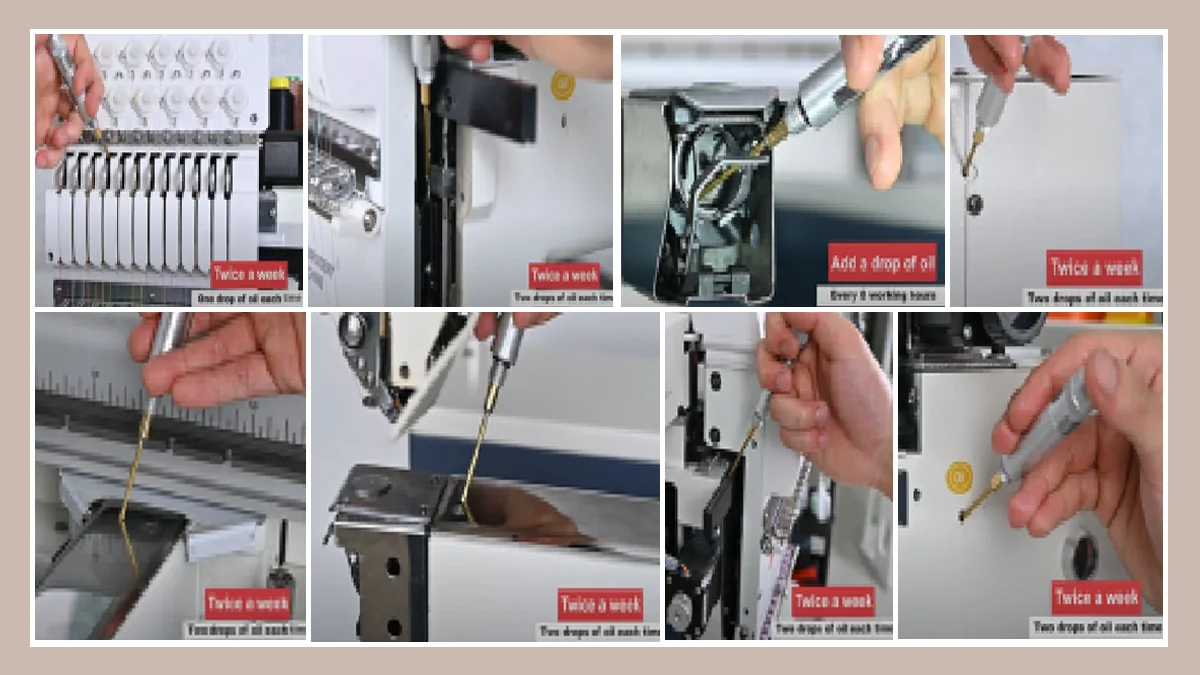
#2 Oil : find each oil point, use the oil dripping tool to oil in turn. The parts that need to be oiled are the parts of the machine that often need to move, including the head of the oiling holes (two drops each time), the oiling holes on the surface of the shuttle bed (two drops each time), the guide rail (this step you need to move the machine body, the left and right sides of the guide rail evenly on the oil, two drops each time), the bobbin hook (pay attention to take out the bobbin core, one drop each time), the drive pole (two drops each time), all of the needle bar (one drop each time). The specific position can refer to the following picture.
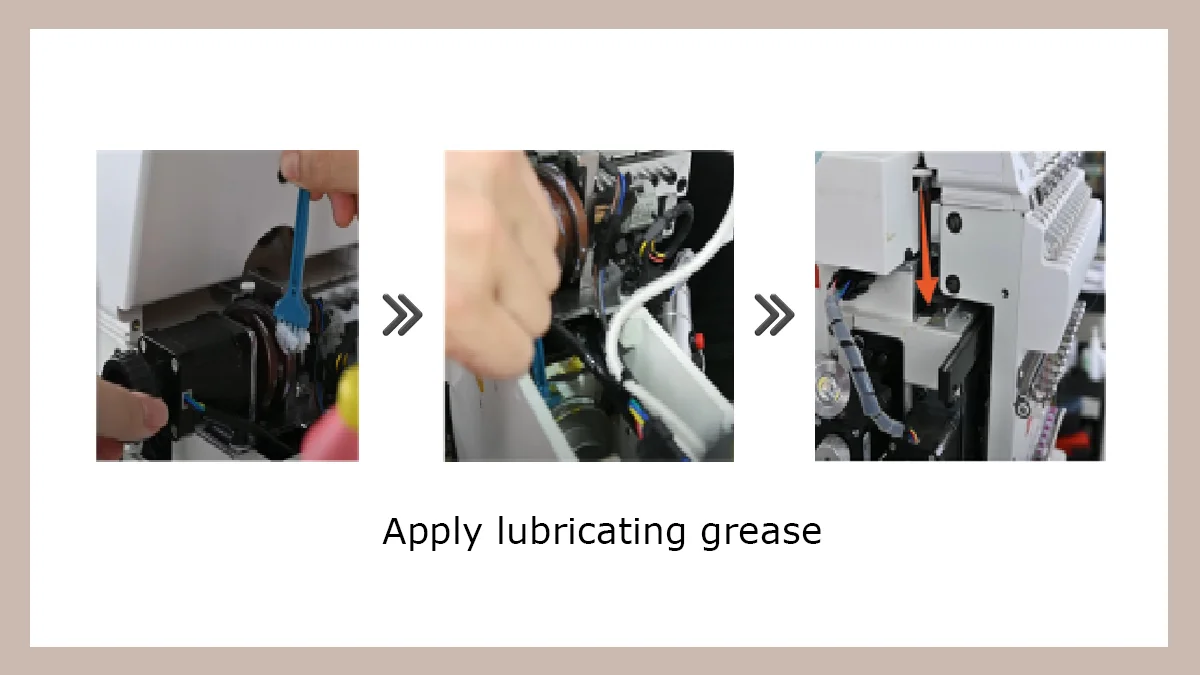
#3 Brush grease: Take out the brush, dip it into an appropriate amount of grease and spread it evenly. There are usually three places where you need to apply grease: the cam located inside the motor's protective cover (you need to remove the protective cover of the housing), the cam inside the spindle (again, remove the protective cover first), and the back part of the guide rail (first adjust the needle position so that the headstock is moved to the far right, and then you will be able to see the back part of the guide rail). When brushing the grease to all these places, you need to turn the corresponding knob while brushing.
#4 Cleaning: After the oil is finished, excess oil is easy to seep out. If you don't clean it up in time, it may stain the surface of the machine or even drip onto the embroidery fabric. So you need to use a cleaning cloth or cotton swab to clean it up.
Click here to watch our instructional video on oiling(https://www.youtube.com/watch?v=0PHYMbMgf8w)
-Frequency
For the parts that use sewing machine oil, it is recommended to oil the bobbin hook after each use, and to oil the other parts every 7 to 10 days. If you work every day, twice a week. If you work more than 8 hours a day, you can work 3 times a week.
For the parts that use grease, it is recommended to just brush them once every six months. The oil is not volatile, so it will stay longer and you don't need to add it too often.
Generally, it takes about 10 to 15 minutes to oil an embroidery machine.
-Note
Adding the proper amount of sewing machine oil and grease is sufficient, not the more drops the better. Too much grease may cause problems such as lubricant spillage, oil accumulation and uneven lubrication. Also take care to select the proper grease.
4. How to change embroidery machine needles?
Every time you use your embroidery machine, your needles are at work. Keeping an eye on them, replacing them if something goes wrong (not to mention if a needle breaks), and keeping them clean and sharp are prerequisites for creating precision embroidery.
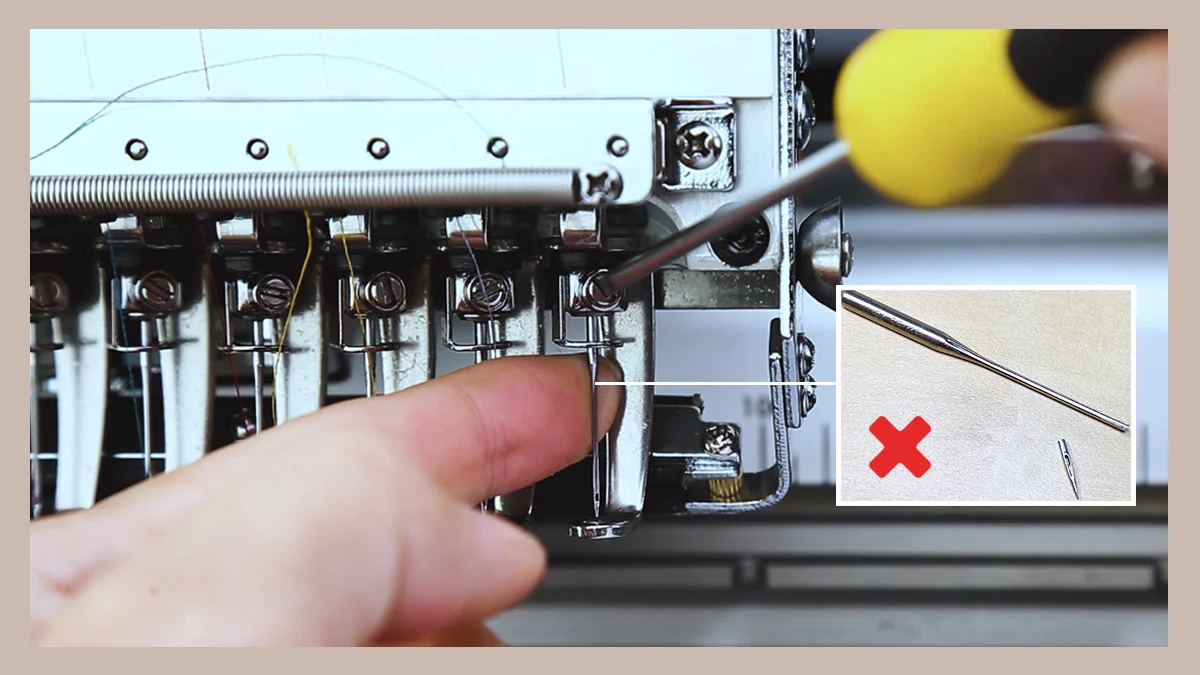
-Judgment criteria
Needle eye: Check the needle eye for wear, cracks, deformation or burrs.
Needle tip: Observe whether the needle tip shows obvious wear or deformation. Poor embroidery results are often due to a dull needle tip.
-Steps
#1 First make sure the embroidery machine is turned off.
#2 Locate the needle bed and needle plate and use a screwdriver to undo the screws holding the embroidery machine needle in place and remove the old needle completely.
#3 Select a new embroidery machine needle. To perform embroidery machine maintenance you just need to make sure that it matches the size and type of the original needle. If you are replacing a needle because you are changing the type of embroidery or the embroidery fabric, choose the appropriate type and size of needle for your needs. If you don't know how to choose the right needle, you can refer to the article How to Choose the Right Needle for Your Project.
#4 Tilt the needle 15 degrees to the left and insert the new needle into the needle bed of the embroidery machine, making sure the needle handle is fully in. Then put back in the screws that were undone.
-Frequency
It is recommended that embroidery needles be replaced monthly or quarterly when the frequency of use and workload are high.
If the embroidery machine is used with deteriorated embroidery quality, broken threads or misaligned threads, it may be necessary to replace the embroidery needle earlier..
If the needle is visibly worn, deformed, bent or broken, it is necessary to replace the embroidery needle immediately.
-Precautions:
Before replacing the needle, it is advisable to clean the needle bed and needle plate to ensure that there is no residue or thread.
When replacing the needle, be careful to avoid the tip of the needle touching fingers or other objects to prevent injury.
After installing the new needle, you can perform an embroidery test to confirm that the needle is installed correctly and to check how well the new needle works.
5. What other things need to be taken care of?
Now you've learned to clean, oil, and change needles. So learn a little more about the other things you need to be aware of!
-Pay attention to the safety of electricity. Embroidery machine is powered by the power supply, in order to avoid circuit failure, you need to regularly warp check the power cord, line connection, control panel and so on. If you find any abnormality, you should repair it in time or contact professional maintenance personnel.
-Avoid long time continuous work. Long time continuous work will make the embroidery machine overheat and may affect the life of the machine. Take appropriate breaks to allow the machine to "cool down" when in use.
-Keep it dry. Embroidery machines should be kept in a dry and ventilated environment to avoid the effects of moisture or harmful substances. If the embroidery machine is not used for a long time, it is recommended to place it in a closed transparent plastic bag to prevent dust. Of course, dustproof cloth cover is also a good choice.
-Learn the usage skills: Understand and learn the usage skills and operation methods of the embroidery machine to avoid the damage of the machine caused by misoperation.
That's all this blog is about. Have you learned anything yet? All in all, embroidery machine maintenance is a "course" that varies from person to person, and still has to be done in the context of your reality. But in any case, regular maintenance can reduce a lot of hassle. If you're still confused, click here to visit our Facebook group to connect with other BAi users.
-1.png)

